wax resist textures

These wax resist textures are easy and fun to make. You can quickly build up a whole pile of interesting papers to use in your artworks.
Here, I have made some textures especially for some elephants, but really they can be used for anything you want! I have used mine to make these stand up card cut-outs. They can fold flat so they would be ideal to send out as a greetings card.
This is a great one for kids as well, because they are made with things that you probably have. No expensive supplies are needed! I used oil pastels but wax crayons would work too. My favourite texture is made with the stub of a wax candle and some paint. I use gouache, because that’s what I have, but any paint will work.
You will need
some paper - I used white paper from the printer
thin card - an old cereal packet is ideal
oil pastels or wax crayons, a candle
paint
glue
scissors
a template for the elephant (download and print here)
grid texture
step 1

Draw some lines with the pastel. I did a kind of grid, where the lines cross over one another.
step 2
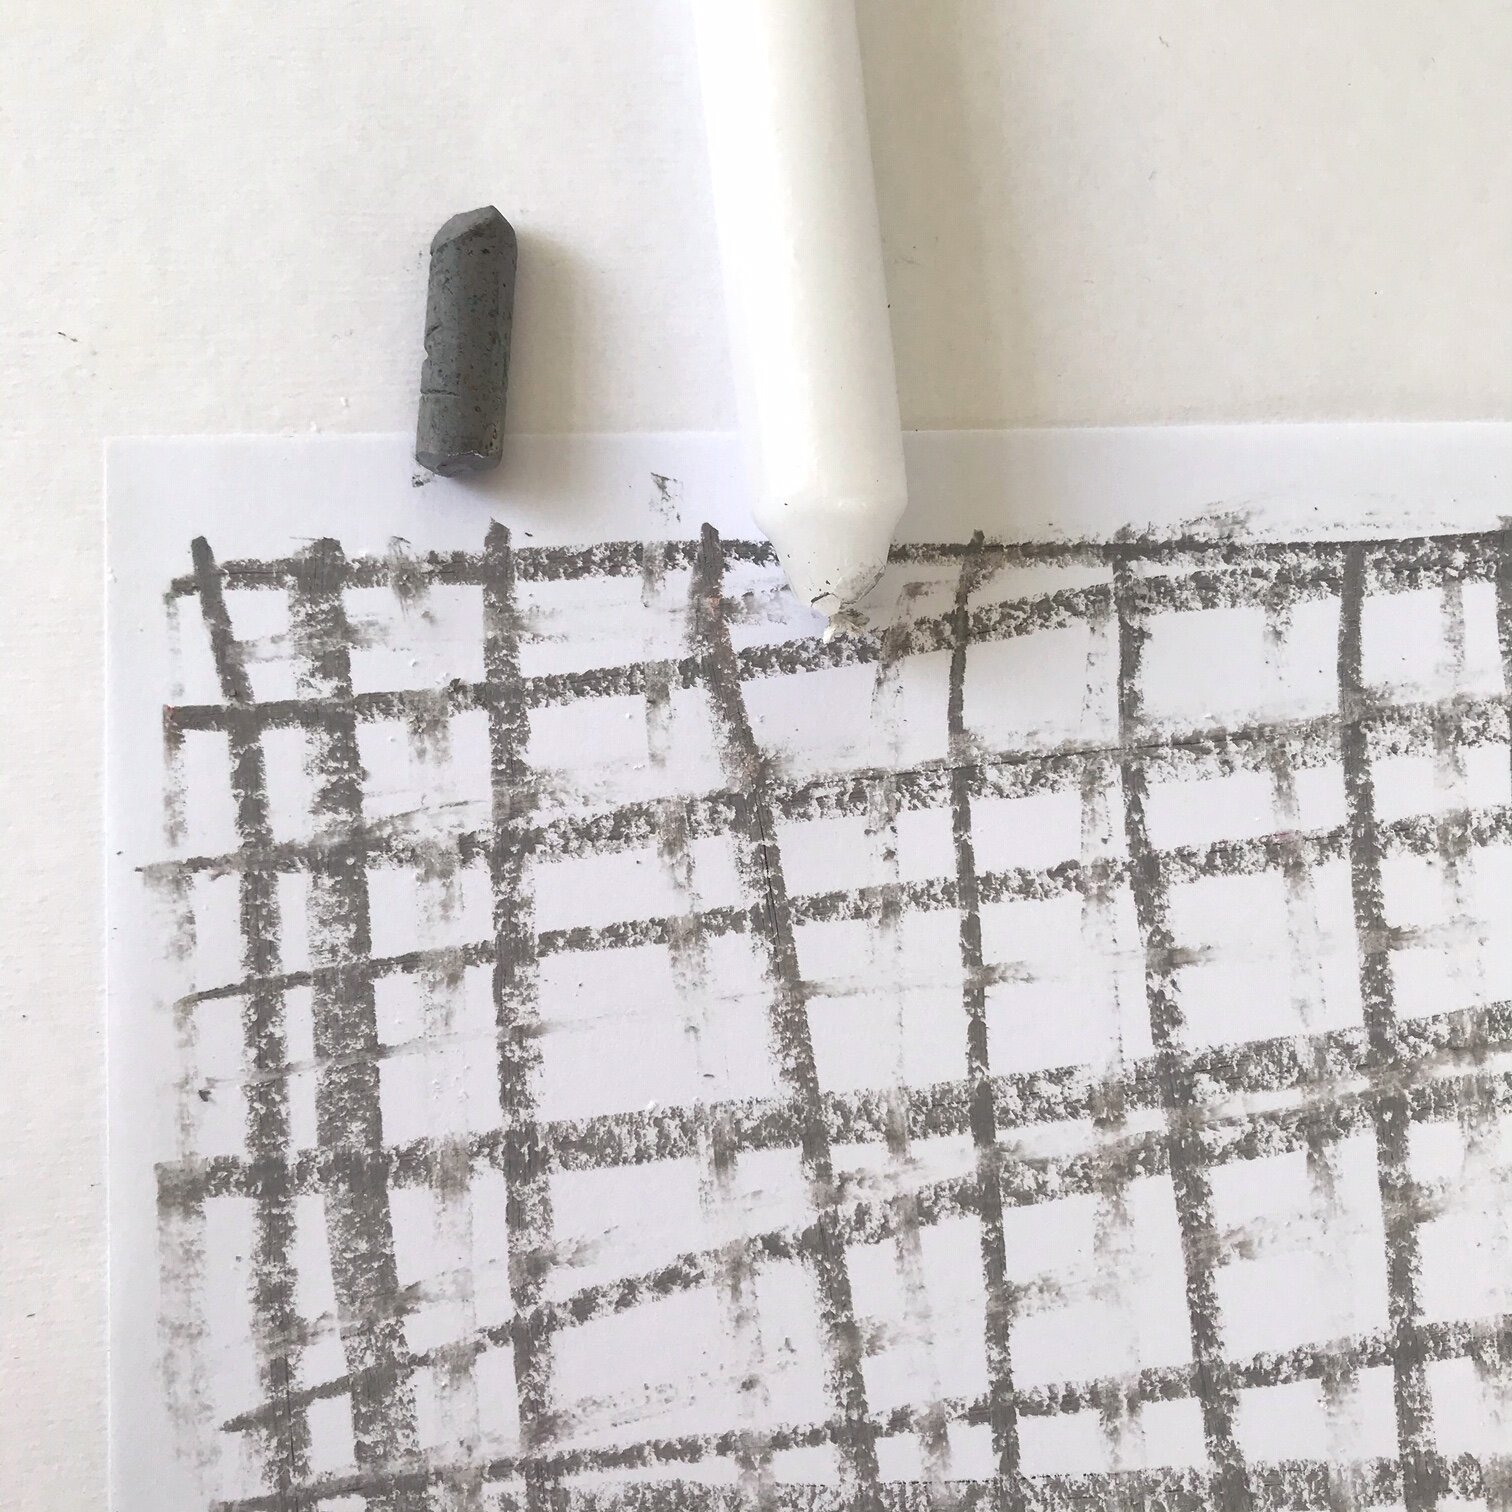
Use a wax candle to make some lines in-between the pastel lines.
step 3

Mix up some paint. It should be quite thin, with plenty of water mixed in. Go over the whole page with a layer of paint.
step 4

Alternatively, here I have only used the candle. This is great fun for kids as the lines appear like magic.
cut-up-card texture
step 1

Cut up some pieces of card and place them down on a flat surface.
step 2

Place a piece of paper over the top and rub all over with the side edge of a pastel.
scratched line texture
step 1

Cover an area of paper with a pale colour pastel. Using the pastel or crayon on its side is best.
step 2

Go over the same area of pale colour pastel and cover with a darker colour.
step 3
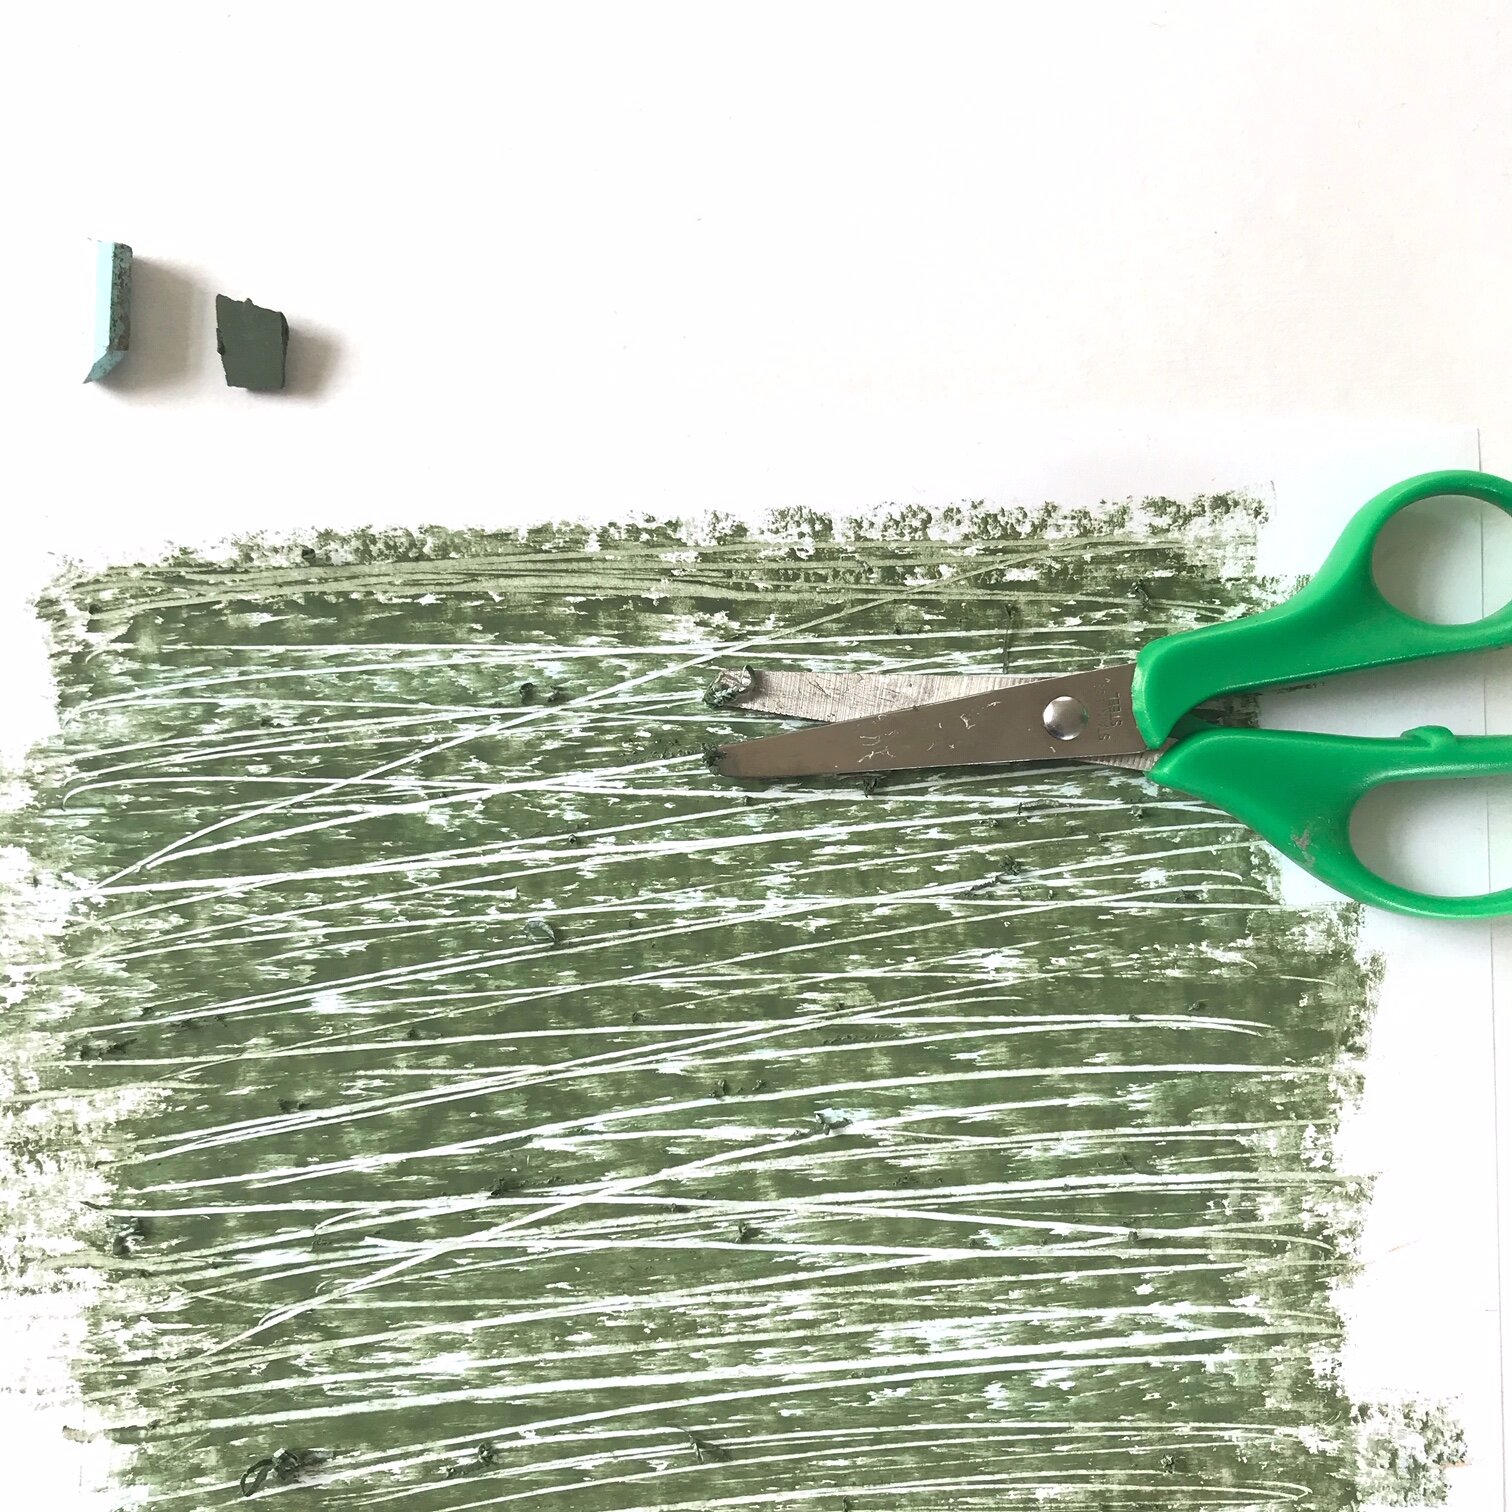
Use the end of some scissors to scrape some lines on the page - revealing the pale colour below.
speckled pastel texture
step 1

Cover a page with stripes (or any pattern you like) use different colours and overlap the lines.
step 2
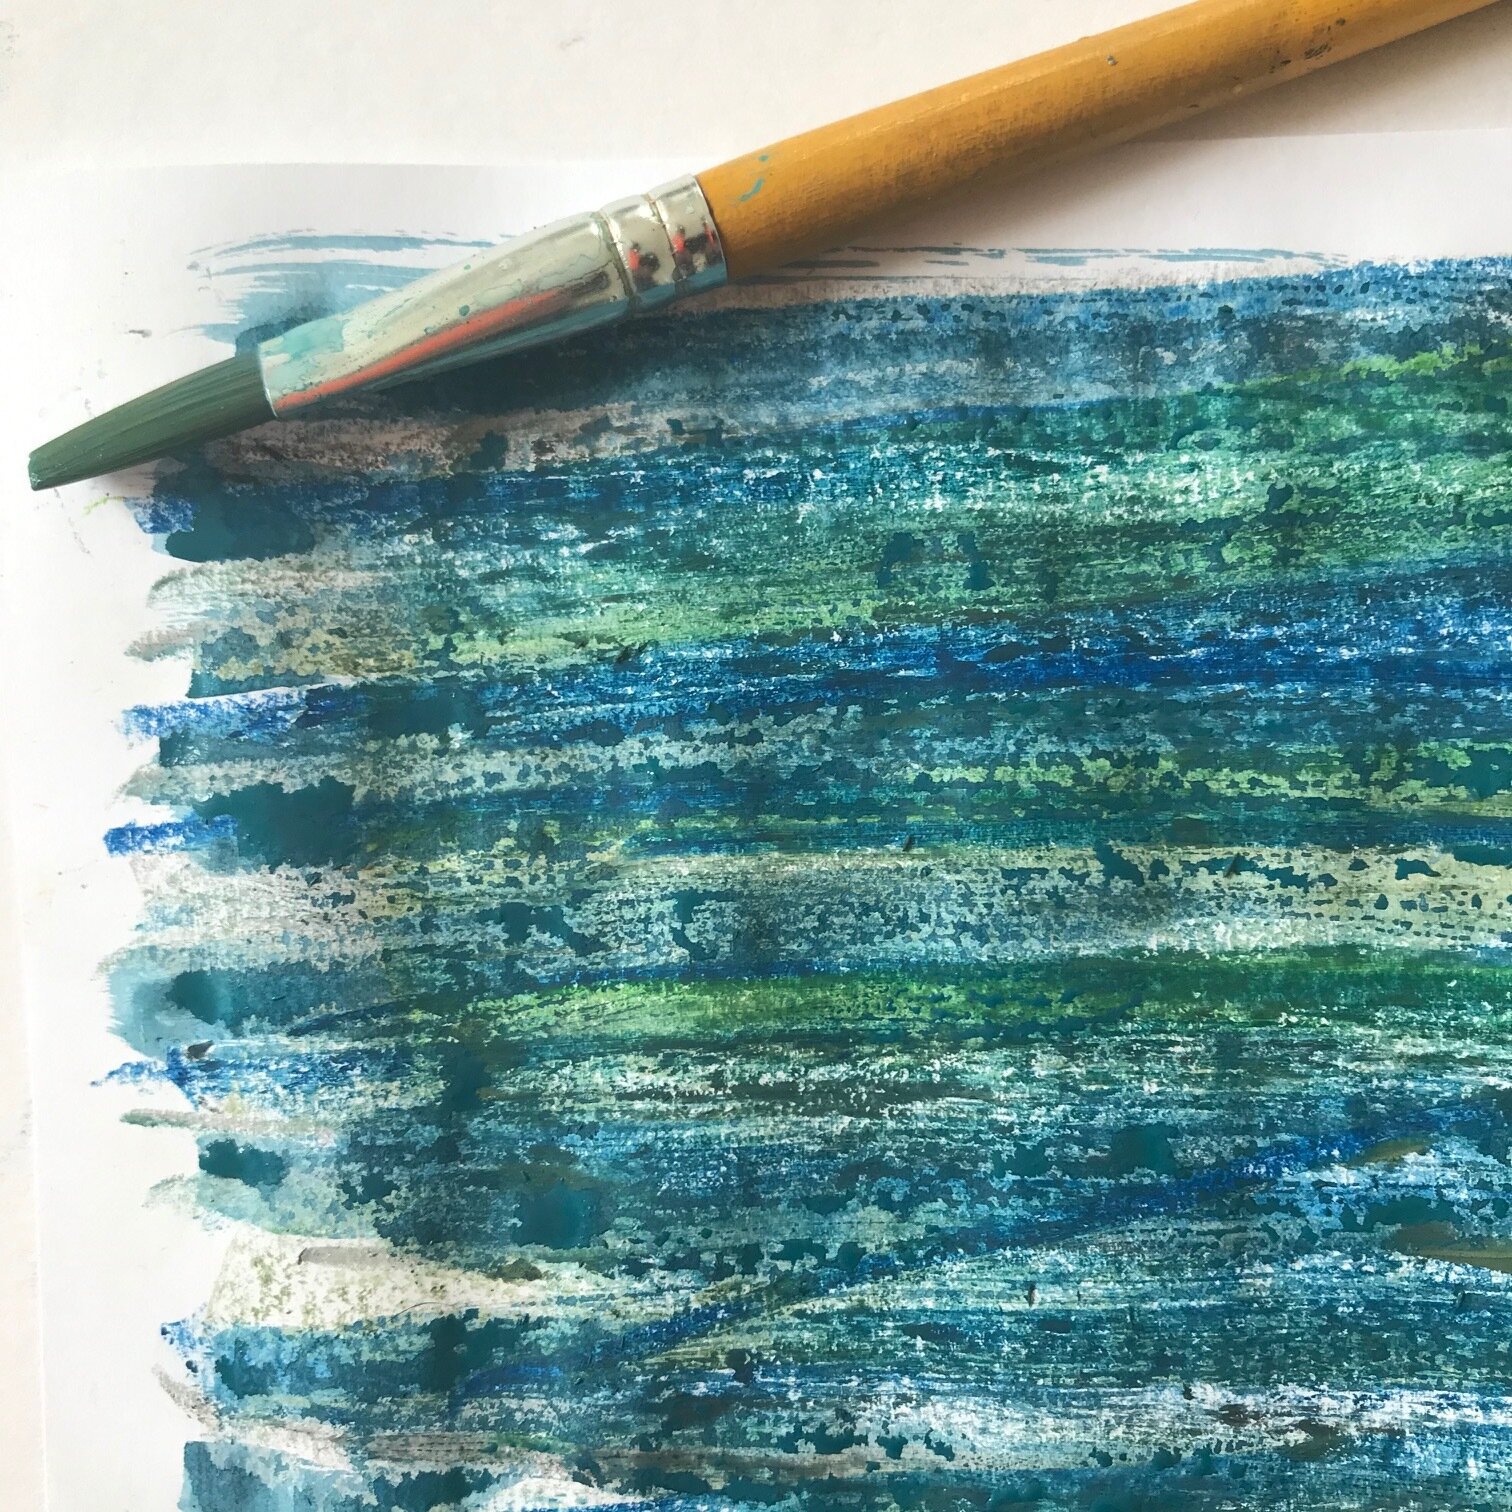
Use thin paint to make some more stripes over the top. You will get lovely areas of speckles.
pencil line texture
step 1

Use a pencil to make some lines or patterns onto some paper. Press really hard.
step 2

Turn the page over and rub all over with the side edge of a pastel. The pastel colour will show on the raised lines.
now you can make a stand up elephant!
step 1

Take one of your sheets of texture and stick it down on some thin card.
step 2

Click here to print out the template, if you haven’t already.
You don’t have to use the template, it would be nice to make your own elephant shapes. You need a body, one piece for the ears and two leg pieces. If you are using the template, cut the shapes out, lay them on the card, draw around them. If you find it difficultly to see the lines, you could draw out the shapes on the back of the card.
step 3

Cut out the shapes.
step 4

Lay the template back on the shapes to cut the slits. You can leave the slits as one snip of the scissors but to make sure that the pieces slot together well, it is best to cut a slither of card away, to make the slot slightly wider. It must still be very thin. If you are making your own shapes and you want the ears to be level with the top of the body, make sure that the slit measures half way through the ear shape and the slit measures the same on the body section. On the feet sections I made the slit in the body and feet approx. 10mm.
step 5

Slot the pieces together and you can stand your elephant up!